Solving Agricola: Family Edition
Agricola is Board Game Geek’s most popular worker placement game, which is a genre of game where each player chooses an action by putting a token (AKA, worker) on a shared board. The trick is that action spaces are usually limited, which means other players might block you from taking an action. In the case of Agricola, the actions are related to building a farmstead: fencing off pastures, plowing fields, sowing grain, expanding your house, collecting resources and making improvements.
Recently, I purchased Agricola: Family Edition, which streamlines the full game to make it easier to learn and quicker to play. It also supports solitaire play. Now the Family Edition is a perfect information game, so playing it alone is equivalent to solving a puzzle. There is some series of moves you can make to get the maximum score and “playing the game” is attempting to replicate that series of moves.
In this post, I will attempt to solve the game. Fortunately, finding a single-player solution is more or less worthless for a multiplayer game as it depends on being able to use exactly the right actions at exactly the right times. Having another player will inevitably mean actions will be blocked and resources will be unavailable at the moment you need them. In addition, I will provide rules for a solitaire variation that’s more interesting to play.
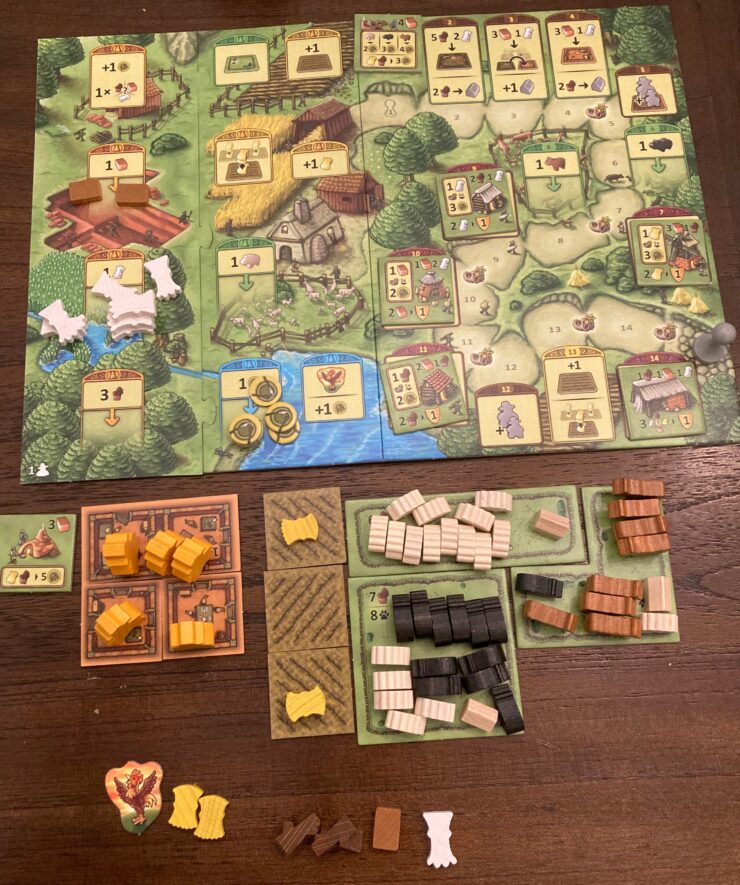
Current high score
The first thing I did was play the game myself to see what score I got without optimization. I got 70, which seemed fairly respectable.
Then I visited this thread on Board Game Geek and discovered people getting scores in the 100s. But then I started looking at the photos people had taken of the end game and noticed two obvious problems:
- Some people had more animals than is possible in a solo game. Take sheep. They accumulate one per turn starting with turn #1. So if you wait until turn 14, you can collect 14 sheep (if you have pasture space for them). After turn 14, there is a harvest, which includes a breeding phase. That means you will end up with 15 sheep. In order to maximize sheep, you need to collect 2 before the first harvest (turn 4) and also collect accumulated sheep on the last turn. If you do all that, you will have at most 20 sheep. So people seem to have misread the breeding rule.
- Other people had a dozen or more fields with 2 grain. Since both turn 13 and 14 end with a harvest, those fields must have been sown on the final turn. But the sow action can only sow 3 fields and there are only 2 sow actions available on the final turn. So there can only be 6 fields with 2 grain. Now it is possible to have 9 more fields with 1 grain at the end of the game if sowing once in turn 12 and twice on turn 13. That means players must have misread the sowing or harvesting rules.
It’s not really surprising. Board games require players to enforce the rules themselves and solo gamers have the additional challenge of enforcing the rules on their own play. It’s incredibly easy to make a mistake early on and discover your error after it’s too late to correct. My 70 point game came after several failed starts, so I sympathize.
I’m not sure if 100 point games are possible. Still, the attempt suggest two core strategies:
- Maximize animal production.
- Maximize grain production.
From there, use extra actions to collect as many other points in the game.
Grain game
I’m starting with maximizing grain because it’s often cited as the superior strategy. My goal is to end up with 6 fields holding 2 grain and 9 holding 1 grain for a total of 21 grain points. (The fields also score points, but I’m not worried about that at the moment.) I also want to get the windmill and score as many points from harvested grain as possible. Since there are 14 plowing actions plus two plow and sow actions, I can only afford to not plow one time. (I need 6+9 fields and I have 14+2 plowing actions to use.)
For this game, I will avoid: 1. Getting reeds. 2. Adding to my house. (No reeds for thatched roofs.)
That means I will use the last three turns to make new workers using the turn 12 action that doesn’t require building new rooms. On the one hand, my actions will be very limited the entire game. On the other, I won’t have to feed many workers eating my precious grain.
First harvest
One of my workers will need to plow every turn in the game but one. We’ll call him the plowman. The other worker will be doing a variety of tasks around the farm, so we’ll call her the farmer. We need to get three fields sown before the first harvest so that we will have enough seed for the rest of the game. In order to sow the maximum possible seed for the first harvest, we need the farmer to collect grain for three turns. That accounts for 7 of the 8 actions before the first harvest (3x plow, 3x collect grain and sow).
But now we need to think about a critical part of Agricola: feeding workers. Every harvest your workers must eat. In the solo game, you start with 2 food, which is enough to feed one worker. We could let our other worker starve, but that means they would need to take 2 begging markers which cost 3 victory points at then end of the game. Fortunately, we can go fishing. The fishing action allows you to collect food that has been accumulating each turn. In turn 4, there are four food tokens which is exactly enough to feed both workers. Since this is the one turn we plan for our plowman to have off, we’ll let him fish this turn.
Second harvest
As the game goes on, the space between harvests shrinks. This time around we have three turns before harvest. Naturally we will have our plowman do his thing, but what about the farmer? Well, turn 7 should be a sowing turn for her so that we can maximize the second harvest of grain. But we also need to get better about feeding our workers. The most efficient way to produce food is to use the oven that costs 3 clay to build. That allows us to turn 1 grain and 1 wood into 5 food. The sooner we get our bread baking operation going the better.
We’ve accounted for 4 of the 6 action before the next harvest (3x plow and sow). That leaves two actions to get baking going. Unfortunately, we need three actions: 1. Collect clay for the oven. 2. Build the oven. 3. Collect wood to burn.
So we’ll need to go fishing again. If we go in turn 6, there will be two food available and we can add that to the two food we started with to feed the family. We can’t build the oven without clay, but I’m going to collect the wood first. If we collect clay in the fifth turn, we will only get 5 and we need 6 clay to build both the oven (3 clay) and the windmill (3 clay plus 1 wood). Wood accumulates at 3 per turn and 15 wood should be enough.
Third harvest
Plowman plows and the farmer collects the clay and builds an oven. So the third harvest represents the last time starvation stares down at our family. From now on we subtract one wood and one grain to get 5 food.
Fourth harvest
We’ve reached the endgame. There are 3 harvests left, we’ve built our farming engine and we can feed our family efficiently. We have 9 fields of the 15 we’d like to plow and the farmer has some breathing room. I think this is the fastest we could have gone to get to this point. Now let’s talk about victory points.
Since we are generating grain, the obvious next choice is a windmill. It turns each pair of grain in our supply into a victory point. There’s no particular hurry to do this, however. We just need to make sure it happens before the last turn.
The other asset we have is wood. We’ll need some of it for making bread: * 1 wood for the fourth harvest * 2 wood for the fifth harvest (our family will have grown to 4 by then) * 2 wood for the sixth harvest
Subtract the wood we needed to build the windmill and that leaves 8 wood. If we build a joinery (costs one wood and two clay), we can turn our leftover wood into 3 victory points (one per pair). We might also be able to grab the wood that has been accumulating the entire game since we gathered wood in turn 5. If we do that at the end of the game, we’ll have 25 more wood for a total of 31. That’s 15 extra victory points.
That’s not bad, but maybe we can do better. We can also use that wood to build a pasture. This isn’t a ranch per se, but each sheep is worth a victory point and we can grab 15 of them if we wait for the last turn. There’s a problem, however. The largest pasture only holds 8 animals and we’d need to take a second turn (and two more wood) to build a barn. (Barns use the same action as expanding or upgrading your house, but we don’t need to use that part of the action.)
So I think the joinery and the windmill are the way to go. As luck would have it, the joinery shows up on turn 11, which is just in time. Notice we are not sowing because we don’t have enough actions and we want our fields to lie fallow so that we can maximize the final two harvests.
Fifth harvest
I had planned to plow, sow and get a new worker in turn 12, but there’s a problem. We don’t yet have a third person to take the third action. We have to pick 2 of the three. Each person is worth three victory points. For turn 13, I was hoping to give birth to another worker, sow, plow and take the new action that lets me plow and sow in the same action. Again, I’m one worker short. Looking ahead, I want to do those four actions on turn 14 plus gathering wood. So for the final 3 turns, I want to do one more action than I’m allowed because I didn’t get a third worker earlier.
Let’s figure out how to maximize points at the end of the game given just the two workers. At the end of turn 11, we have 10 fallow fields. Taking the “plow and sow” action will add 2 more by the end of the game. In order sow those 12 fields, we need to take 2 additional sow actions. Given three actions taken on getting new workers and one action to gather wood, we have one final action to use. If we use to plow, we will have an empty field that only scores one. We don’t have enough actions to buy anything other than a pasture, which costs us wood victory points and we won’t have time to get any animals.
Every time we bake bread it costs us a grain and a wood which are half a victory point each. Instead, let’s get food from the fishing pond. If we wait until turn 13 (and let the new worker fish) we collect 7 food to add to our existing 2. In the fifth harvest, we have 3 workers, but the newest is still an infant and only needs one food. We can avoid baking bread twice this harvest, which is worth 2 victory points for the 2 wood and 2 grain.
Sixth harvest
For the final turn we need to finish plowing, sowing, getting the last worker and gathering wood. It’s been 9 turns since we last got wood, so there’s 27 waiting for us. We need to burn one wood to bake. We’ll have 7 food, but we need 9 (4 adults and one newborn). While we could bake a second time, our windmill lets us turn 1 grain into 3 food without using wood. Or we can use the joinery and sell 1 wood for 2 food. Either works, but the best choice is whichever produces even numbers of wood and grain. If I did the calculations right, that’s still a wash. Let’s pick wood so that we don’t end up with any leftover food.
Turn summary
| Turn | Actions | Resources | Harvest? |
|---|---|---|---|
| 1 | Plow Gather grain |
1 grain 1 field 2 food |
No |
| 2 | Plow Gather grain |
2 grain 2 field 2 food |
No |
| 3 | Plow Gather grain |
3 grain 3 field 2 food |
No |
| 4 | Fish Sow |
3 field+++ 6 food |
Yes |
| 5 | Plow Gather wood |
3 grain 3 field++ 1 field 2 food 15 wood |
No |
| 6 | Plow Fish |
3 grain 3 field++ 2 field 4 food 15 wood |
No |
| 7 | Plow Sow |
3 field+++ 3 field++ 4 food 15 wood |
Yes |
| 8 | Plow Gather clay |
6 grain 1 field 3 field++ 3 field+ 15 wood 8 clay |
No |
| 9 | Plow Build oven |
6 grain 2 field 3 field++ 3 field+ 15 wood 5 clay Oven |
Yes |
| 10 | Plow Build windmill |
11 grain 6 field 3 field+ 13 wood 2 clay 1 food Oven |
No |
| 11 | Plow Build joinery |
11 grain 7 field 3 field+ 12 wood 1 food Oven |
Yes |
| 12 | Sow Birth |
13 grain 10 field 11 wood 2 food Oven |
No |
| 13 | Plow and sow Birth Fish |
7 grain 6 field+++ 5 field 11 wood 9 food Oven |
Yes |
| 14 | Plow and sow Birth Sow Gather wood |
7 grain 6 field+++ 6 field++ 38 wood 2 food Oven |
Yes |
| 15 | Rest | 25 grain 6 field++ 6 field+ 36 wood Oven |
No |
Score:
- Workers: 15
- Upgrades: 3
- Fields: 12
- Unharvested grain: 18
- Harvested grain: 12
- Wood: 18
Total: 78
Verdict
Looking back at the first harvest, I think we can get the bread economy going if we give up one of the plow and gather grain steps. In turn 3 the farmer can gather clay rather than grain and the plowman can build the oven. Then in turn 4, gather wood and sow. (These steps could be reversed based on need.) That will require a bit of rejiggering to get enough grain to plow fields in time for the second harvest and it should allow a third worker before turn 12.
What it won’t allow is 15 plowed fields by the end of the game. I think it’s possible to have 14 and I know 12 will work, but the only way to know for sure is to game it out.
The big problem with the grain-only strategy is that it leaves over 30 victory points in the animal markets. I believe an ideal strategy is to use grain for food most of the game and get the bulk of points from animals. But that theory must be tested first. (And that’s a task for another day.)
How to improve your solitaire experience
Having played a few times, I have some tips to improve the experience of solitaire Agricola:
- Don’t worry about the preparation phase. It’s important for multiplayer because anyone can take the goods at any time. But for solo play it’s faster to just calculate how many good you can collect when you take the action. The first time you take reeds, just take the number equal to the turn marker. For wood, multiply by three. Then place the substitute marker for that good on the turn space that you collected it so that you can remember how many goods are left the next time.
- As long as you are careful not to repeat an action, you don’t need to move your workers around.
- It’s not ideal, but there is a Tabletop Simulator mod for Agricola: Family Edition. It’s handy for trying out ideas that come to you when the board isn’t set up.
- Take notes so that you can retrace your steps if you get a high score.
A solitaire variation
Compared to playing with other people, solitaire Agricola doesn’t thwart your plans. So I’ve tried two additional rules to make the game more challenging:
Let’s borrows a trick from the solitaire variation of Nusfjord, which is another game from the designer of Agricola, Uwe Rosenberg. Use two colors and alternate workers. After the first turn, instead of taking your workers off the board, switch to the second color. That means you can’t repeat an action that you took in the first turn. Then, at then end of turn 3, take back your original color workers and use them for turn 3. When you add a worker later in the game, take a worker of both colors.
I used this variation in my first full solo game and it forces you to diversify your farm. It’s impossible to plow more than 8 fields and you can’t us the last three turns to collect workers. For an even more challenging game (which I haven’t tried myself) use three colors. At that point you are playing a game that more closely resembles the multiplayer game since many actions will be blocked.
The rooster action is normally not useful in a solo game since there’s not turn order to be first in. But with alternating workers, there are spaces that can be blocked. In this variation, the rooster space allows you to remove a worker of the opposite color from an action space so that you can use it again. (It also comes with the 1 food as normal.) Note that there’s no way to remove a worker from the start player action except to wait for it to be pulled off normally.
The other alternative is to use this space as a repeat action space, but that would allow you to repeat an action you’ve already taken this turn, which seems out of the spirit of the game.
The first upgrade you can purchase is a cooking upgrade. There are six options, but in the solo game only three will ever get played. That’s because half the options are more expensive versions of the same upgrade. For instance, there is a Fireplace that costs 2 clay and another that costs 3. In addition, the oven is often the most efficient way to feed your family since it converts one grain and one wood into 5 food. The Cooking Hearth and Fireplace also give you flexibility to use animals for food, which is a lot less attractive for high score runs.
In this variation, shuffle the 6 cooking upgrades and select the top from the pile. That is the only upgrade you can purchase from the turn 1 space. If you purchase that upgrade, turn over the next tile, which is the next possible purchase. This gives you a slightly more complicated decision about how to feed your family. It also makes the other upgrades more attractive later in the game since they can convert other resources into food.
I haven’t tried this yet, but it would also add variation to shuffle the other improvement tiles and deal them randomly to their spaces. That could mean the Depot (which only converts resources to victory points) turns up on turn 7 rather than the Windmill (which also converts grain into food). For maximum impact, only select one of these tiles when you hit each upgrade turn. The main consequence of this change is it changes which resources you can turn into food later in the game.
These variations dramatically increase the puzzle space and make it much harder to optimize your score. They also make the game work more like the multiplayer game where action spaces can be blocked and upgrades could be taken by someone else.
I don’t have a good idea what scores can be achieved, but my high score using the alternating color variation is 70. (See the image above.)